
Your home is filled with hardworking appliances that make life easier, from keeping your food fresh to ensuring your dishes and laundry are spotless. But without regular care, these appliances can lose efficiency, develop odors, or even break down. If cleaning appliances feels overwhelming, don’t worry, that’s where this all-inclusive guide comes in! We’ve broken down everything you need to know about cleaning appliances year-round, ensuring they stay in top-notch condition. Plus, we’ve highlighted innovative products that can make the job far easier.
Discover the Best In-Stock Appliance Deals
Explore the latest appliances for the kitchen and laundry room for easy cleanup around the year.
Shop In-Stock AppliancesHow Often Should You Clean Your Refrigerator?

The fridge works nonstop to keep your food fresh, and that constant use means spills, crumbs, and smells are inevitable. To prevent buildup and maximize efficiency, you should include cleaning appliances in your routine and incorporate spring cleaning kitchen tasks, doing a deep clean every three months with smaller refreshes in between.
Refrigerator Cleaning Checklist:
✔ What You’ll Need: Mild detergent, vinegar, baking soda, microfiber cloths, warm water, and a vacuum for the coils.
✅Door gaskets: Wipe refrigerator seals to remove mold, grime, and food bits.
✅Shelves (including under inserts): Remove and wash refrigerator drawers thoroughly.
✅Crisper drawers: Deodorize and disinfect to refrigerator drawers with baking soda eliminate odors.
✅Freezer section: Check for frost buildup; clean and defrost if needed.
✅Door bins: Clear sticky spills regularly to prevent grime.
Step-by-Step Refrigerator Cleaning:
- Empty the fridge: Take out all food and store perishables in a cooler during the cleaning process.
- Remove shelves and drawers: Wash each piece with warm, soapy water and dry thoroughly.
- Clean the interior: Use a mix of vinegar and water to wipe down all surfaces. Focus on corners and any sticky spots.
- Tackle door gaskets: Scrub gently with an old toothbrush and soapy water.
- Vacuum condenser coils: If your fridge has accessible coils at the back or base, vacuum them to remove dust for better energy efficiency.
- Replace and organize food: Check expiration dates and wipe down containers to prevent reintroducing dirt.
How the KitchenAid KRSF705HPS Keeps Food Storage Neat
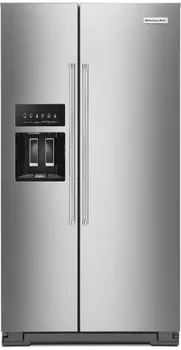
Shop This KitchenAid Refrigerator
Say goodbye to odors and messy spills with this fridge's advanced air filtration and PrintShield Finish, designed to minimize smudges and fingerprints. The easy-wipe shelves make cleanup a breeze, while its odor control features keep your food fresh. We also love the side-by-side layout, which means everything is in plain sight, so there’s less chance you forget about food and produce in the fridge.
⭐Featured KitchenAid KRSF705HPS Review:
“Excellent refrigerator. Perfect size. Being able to remove door shelves from holders for easy cleaning is a great feature. Ice maker very quiet when ice drops in bin & when water refills tray. No splashing with water dispenser. The only regret is that I did not buy this one sooner. Would highly recommend.”
Learn more: 7 Game-Changing Features in the New Samsung Washer and Dryer Combo
How Often Should You Clean Your Dishwasher?
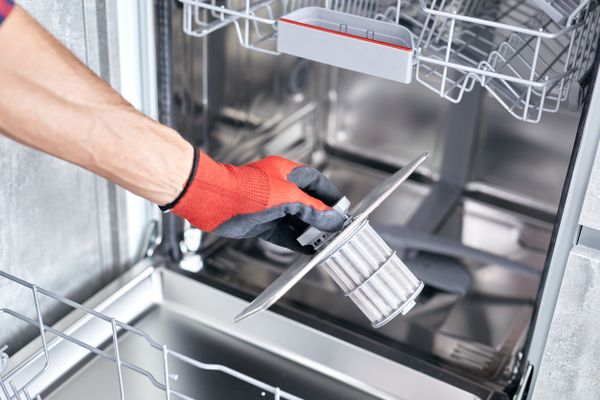
While the dishwasher is responsible for cleaning your dishes, it needs attention too! Built-up food particles, hard water deposits, and grease can cause blockages or unpleasant smells. Wondering how do you clean a dishwasher? Aim for a deep clean every month.
Dishwasher Cleaning Checklist:
✔ What You’ll Need: Baking soda, white vinegar, soft sponges, and a toothbrush for tight spaces.
✅Door gaskets: Wipe down dishwasher door gaskets weekly to prevent grime and mold.
✅Dishwasher filter: Dishwasher owners should remove and rinse debris from the filter about every month.
✅ Dishwasher Spray arms: Check for clogs and ensure proper water flow routinely for optimum performance.
✅ Dishwasher Racks and utensil trays: Wipe down for any stuck food particles.
Step-by-Step Dishwasher Cleaning:
- Empty everything: Remove the racks and utensil holders.
- Inspect the filter: If removable, wash the dishwasher filter with warm water and a bristle brush to remove trapped food.
- Scrub the spray arms: Remove any clogs with a toothpick or pin.
- Run a vinegar cycle: Add a dishwasher-safe cup of vinegar to the top rack and run a hot cycle. Follow with a sprinkle of baking soda on the floor and a second rinse cycle.
How the GE Profile PDT795SYVFS Takes Cleanliness Up a Notch
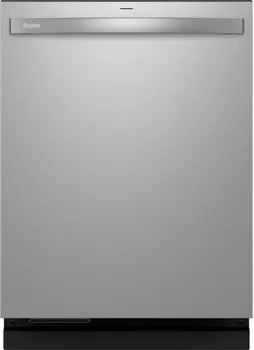
Shop This GE Profile Dishwasher
This dishwasher features Microban technology, which actively resists microbial growth, so your dishwasher stays fresher between cleanings. The self-cleaning filter and superior spray coverage mean you’ll spend less time scrubbing, while the exclusive Piranha Hard Food Disposer takes care of food debris for easy filter cleaning when it’s that time of the month.
How Often Should You Clean Your Stove?
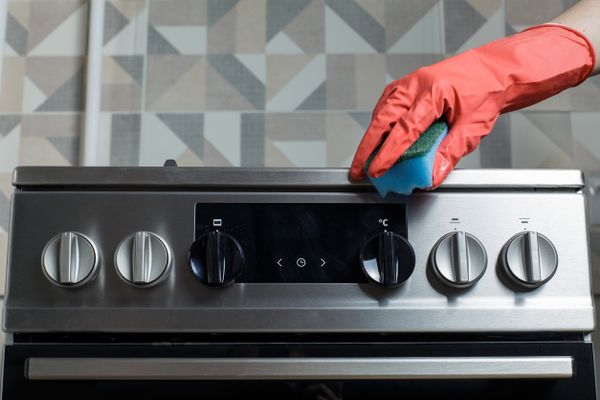
Greasy spills and splatters are a part of cooking, but they shouldn’t stick around long. Make it a habit to clean your stove every two weeks or after particularly messy meals with these stove cleaning tips.
Stove Cleaning Checklist:
✔ What You’ll Need: All-purpose cleaner, microfiber cloths, degreaser, and a polish for stainless steel finishes.
✅Cooktop surface: Wipe up stains and grease as they happen to avoid tough buildup.
✅Oven door gasket: Remove crumbs stuck in door gaskets.
✅Burners or grates: Scrub burners and heating elements with warm soapy water. For gas ranges, be sure to avoid water seeping into the gas channel.
How to Clean Your Stove:
- Remove and wash grates: If your stove has removable grates or burner caps, remove them and wash them in warm, soapy water.
- Wipe down the surface: Use an appropriate cleaner for your stove’s material. Avoid abrasive pads on delicate surfaces.
- Address baked-on spills: Use a degreaser on stuck grease spots or burnt food.
- Clean burners/heating elements: For gas stoves, clear any clogs in the burner holes using a toothpick. For induction cooktops, ensure the surface is smear-free by following up a session of scrubbing with a warm towel, followed by a dry washcloth.
Why the Samsung NSI6DG9300SR Is a Cleaner’s Dream
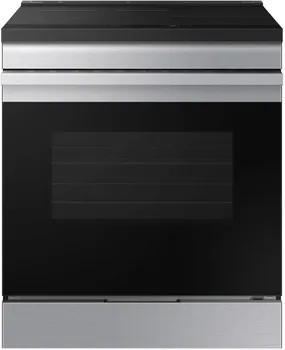
This stove features a surface that’s 54% more scratch-resistant, making it much easier to clean. Plus, the oven boasts self and steam cleaning modes, allowing you to tackle baked-on messes without harsh chemicals. One customer notes, “The scratch-resistant tech is a lifesaver. Cleanup has never been this easy!” Together with its sleek, slide-in design, this beauty is a cook’s joy to have both during dinner prep and when it comes to cleanup.
⭐Featured Samsung NSI6DG9300SR Review:
“The anti-scratch glass is not only stylish but also really easy to clean. And the built-in air fryer? Total game-changer! We've been making healthier versions of our favorite fried foods, and they come out perfectly crispy every time."
Learn more: How Does the LG Stacked Washer Dryer Perform?
How Often Should You Clean Your Oven?
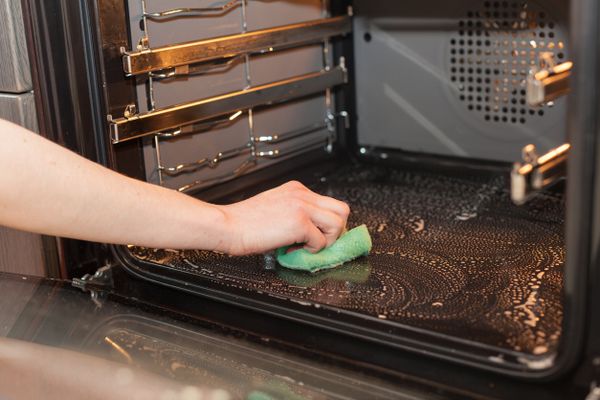
Your oven is a workhorse in the kitchen, but all that roasting, baking, and broiling can leave behind grease splatters, burnt-on stains, and lingering odors. To keep your oven running efficiently and to prevent smoky surprises during your next meal prep, a full cleaning appliances routine every three to six months is ideal.
If you use your oven frequently or cook at high temperatures often, spot cleaning after spills can go a long way toward reducing overall buildup. Here are some oven cleaning tips to help you maintain a spotless kitchen.
Oven Cleaning Checklist:
✔ What You’ll Need: Baking soda, vinegar, warm water, an old toothbrush, microfiber cloths, a scrubbing pad, and a plastic scraper for hardened stains.
✅Oven racks: Remove them and scrub away baked-on residue.
✅Door glass: Wipe down to maintain visibility and remove streaks.
✅Interior walls: Focus on areas with grease splatters or burnt-on food.
✅Heating elements: Ensure they are free from debris for even cooking performance.
Step-by-Step Oven Cleaning Process:
- Remove the racks: Take out the oven racks and soak them in the sink or tub with warm water and dish soap. After soaking, scrub with a non-abrasive pad to remove grease and stains.
- Create a cleaning paste: Mix baking soda and water into a paste. Apply it to the interior walls and base of the oven, avoiding heating elements. Allow it to sit for at least 12 hours or overnight for tougher stains.
- Wipe down the interior: After the paste has loosened debris, wipe it away with a damp microfiber cloth. Use a plastic scraper for any stubborn areas.
- Clean the door glass: Use vinegar and water to clean the inside of the oven door. For burnt-on grime, a paste of baking soda and water can help dissolve tough spots.
- Reassemble and finish: Rinse off the racks, dry them thoroughly, and place them back in the oven. Run a short heat cycle to evaporate any remaining moisture or odors.
How the GE Profile PTS700RSNSS Simplifies Oven Cleanup
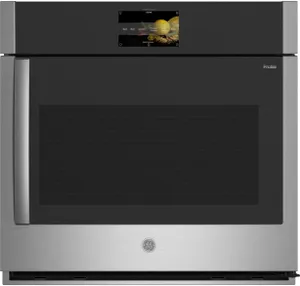
When it comes to cutting down on cleaning time, the GE Profile smart oven is a game-changer. With its self-cleaning mode, it’s designed to tackle baked-on grime without requiring elbow grease. The integrated convection cooking technology ensures even heat distribution, leaving your meals perfectly cooked and your oven in tip-top shape.
⭐Featured GE Profile PTS700RSNSS Review:
"The self-cleaning feature is a lifesaver! It does the hard work while I focus on other tasks.”
Learn more: Drawer Dishwasher Cost vs. Performance
How Often Should You Clean Your Washing Machine?
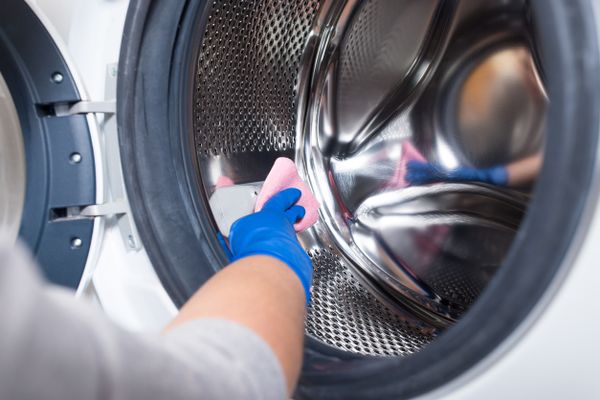
Washing machines are prone to buildup in detergent dispensers, gaskets, and even drum interiors. To keep things fresh and mold-free, deep clean once a month with these washing machine cleaning tips.
Washing Machine Cleaning Checklist:
✔ What You’ll Need: Vinegar, baking soda, and a clean cloth for wiping surfaces.
✅Front loader gaskets or top loader agitators: Focus on cleaning spots prone to grime buildup.
✅Drum interior: Wipe down and deodorize your washer drum ideally every week.
✅Detergent dispensers: Remove residue and clean thoroughly to avoid mold and mildew buildup.
Step-by-Step Washing Machine Cleaning:
- Run an empty hot cycle: Add one cup of vinegar to the detergent tray and run on the hottest setting.
- Clean the gasket or agitator: Focus on tough spots like seals, where mold could grow.
- Add baking soda cycle: Sprinkle baking soda inside the drum and run another hot water cycle.
- Wipe down all surfaces: Once cycles are complete, dry the drum and remove residue from the detergent tray.
2 Ways the GE GFW550SSNWW Keeps Your Laundry Routine Clean
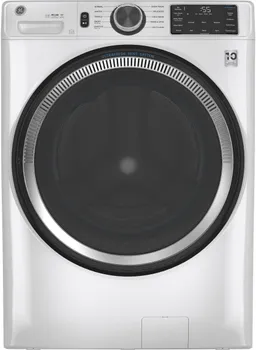
This washer combines cutting-edge technology with practical features for a superior cleaning experience. It includes Microban technology to actively prevent mold and mildew growth, ensuring a cleaner machine over time. The UltraFresh vent system helps keep the drum dry between loads, eliminating the musty smell often associated with front-load washers. With a large 4.8 cu. ft. capacity, it’s perfect for families or anyone who needs to handle large laundry loads with ease. Users rave about how fresh their laundry smells after every wash!
⭐Featured GE GFW550SSNWW Review:
"Does a great job cleaning. Love all the features. Is quiet holds a lot of clothes and plenty of cycles."
How the Electrolux ELFW7738AW Masters Clean Laundry
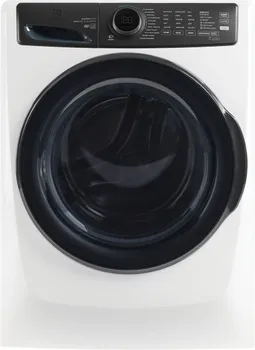
This Electrolux 700 Series washer is designed to deliver powerful cleaning performance while being gentle on your clothes. The sanitize mode effectively removes tough odors, bacteria, and allergens, making it ideal for households with kids, pets, or anyone with sensitive skin. Its 4.5 cu. ft. capacity can handle everything from delicate garments to bulky items like comforters and blankets. With advanced cleaning technology, it saves you time while ensuring deep, thorough cleans for every load.
How Often Should You Clean Your Dryer?
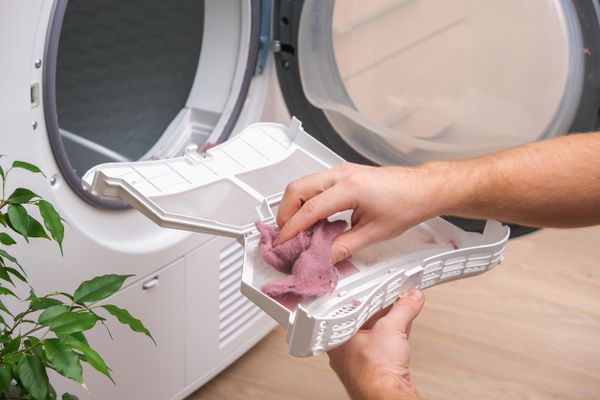
Your dryer may seem low-maintenance compared to other laundry appliances, but a deep clean is essential for both safety and efficiency. The lint filter and vent system can clog over time, potentially causing inefficient drying or, worse, a fire hazard. To keep things running smoothly and safely, clean your dryer thoroughly every six months, with smaller maintenance sessions every few weeks.
Dryer Cleaning Checklist:
✔ What You’ll Need: A vacuum with a hose attachment, a dryer vent cleaning brush, mild detergent, and microfiber cloths.
✅Lint tray: Remove lint after every load and clean the tray itself during deep cleans.
✅Dryer vent and hose: Check for buildup in a dryer vent that could obstruct airflow.
✅Drum interior: Wipe down a dryer drum to remove residue from softened fabrics.
✅Exterior vents: Clear away any debris or obstructions from external dryer vents.
Step-by-Step Dryer Cleaning:
- Clean the lint tray: Remove and vacuum the tray. Wash it with warm, soapy water if buildup is visible. Air-dry completely before replacing.
- Tackle the vent and hose: Disconnect the vent hose and use a vacuum or a dedicated vent cleaning brush.
- Vacuum the drum: Use the hose attachment to remove any lint or debris inside the dryer drum and wipe it down with a clean, damp cloth.
- Check the exterior vents: Remove any debris or lint buildup outside your home where the dryer vent releases air. This area often gathers leaves and lint clusters.
Why the Maytag MED6500MW Is Next-Level
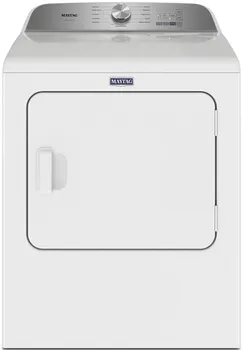
This Maytag dryer makes maintenance a breeze with its extra-wide lint trap, which captures lint efficiently and is easy to clean. Plus, the moisture sensing technology adjusts drying times, reducing wear and tear on your clothes. It’s a must-see for pet owners, who will appreciate its exclusive Pet Pro option that makes easy work of fur on clothes.
Learn more: 4 Reasons to Consider the Bosch 800 Series Refrigerator
Expert Appliance Cleaning Tips
Every home appliance is built differently, but taking care of them doesn’t need to be complicated. With a few simple strategies, you can maintain everything from gleaming stainless steel to sleek black finishes while avoiding common mistakes in cleaning appliances and kitchen appliance maintenance (CLICK THE ➕TO LEARN MORE).
➕Tips for Cleaning White Appliances
White appliances, while classic, can show dirt and discoloration easily.
Wipe regularly: Use an all-purpose cleaner or a mixture of dish soap and warm water to remove grime.
Eliminate stains: For stubborn spots, a paste made from baking soda and water works wonders. Gently scrub, then wipe clean.
Avoid yellowing: Use a microfiber cloth soaked in mild vinegar solution for plastic parts that tend to discolor over time.
➕Tips for Cleaning Black Kitchen Appliances
Black finishes offer a modern look, but smudges and fingerprints are often more noticeable.
Dust first: Use a dry microfiber cloth to remove dust before cleaning.
Use streak-free solutions: Spray glass cleaner on a soft cloth (not directly on the surface!) for a polished, streak-free finish.
Avoid abrasives: Hard scrubbing can dull the finish. Always test new cleaners on a small, hidden area.
➕Tips for Cleaning Stainless Steel Appliance
Stainless steel is durable, but it demands specific care to maintain its sleek appearance.
Follow the grain: Wipe in the direction of the metal’s grain to avoid streaks.
Choose the right cleaner: Use products specifically made for stainless steel or a DIY mix of dish soap and water.
Polish monthly: Apply a small amount of mineral or olive oil with a soft cloth to keep it shiny and repel fingerprints.
➕General Cleaning Tips for All Appliances
Unplug before cleaning: Safety first! Always cut off power before deep cleaning any appliance.
Check the manual: Your appliance manual often includes specific cleaning instructions and safe products to use, including dishwasher cleaning tips.
Avoid harmful chemicals: Skip bleach on sensitive finishes like stainless steel or coated metals. Stick to mild solutions whenever possible.
Use the right tools: Microfiber cloths are versatile and safe for nearly all surfaces. For tough grime, use a soft scrub pad or old toothbrush.
Little steps make all the difference when it comes to cleaning appliances. That’s why little efforts today mean bigger time savers tomorrow, and these tips from our experts are handy tidbits to add to your everyday habits to make your life a little easier. The good news is the market is full of great products that make the job easier, such as the models featured in this guide, and many more from top brands. Explore them all today at Specialty Appliance near you!
Why Trust the Experts at Specialty?
For over 20 years, Coloradans have relied on us for the best in home appliances. We believe in providing a personalized experience for every customer. Our experts take the time to listen to your needs, preferences, and budget constraints, offering tailored recommendations and solutions that fit your unique requirements. Whether you're remodeling your kitchen or replacing a single appliance, you can trust our experts to provide honest, unbiased advice that prioritizes your satisfaction. A factory-certified team ensures a hassle-free experience, meticulously handling every detail from delivery to installation. Plus, with our wide variety of brands and models, you'll have access to the latest innovations, stylish designs, and reliable performance.
At Specialty Appliance, integrity, accountability, and teamwork are at the core of everything we do. We're committed to empowering you to make smarter choices and providing an exceptional customer experience. Proudly serving communities across Colorado, we're dedicated to being your trusted partner for appliance excellence.
Shop Top Brands at Specialty Appliance
Whether you’re interested in the latest appliances or have more questions about cleaning appliances, we're here to help. Discover the Specialty Appliance difference today at one of our five showrooms across Colorado.
Learn more: 4 Reasons to Consider the Bosch 800 Series Refrigerator